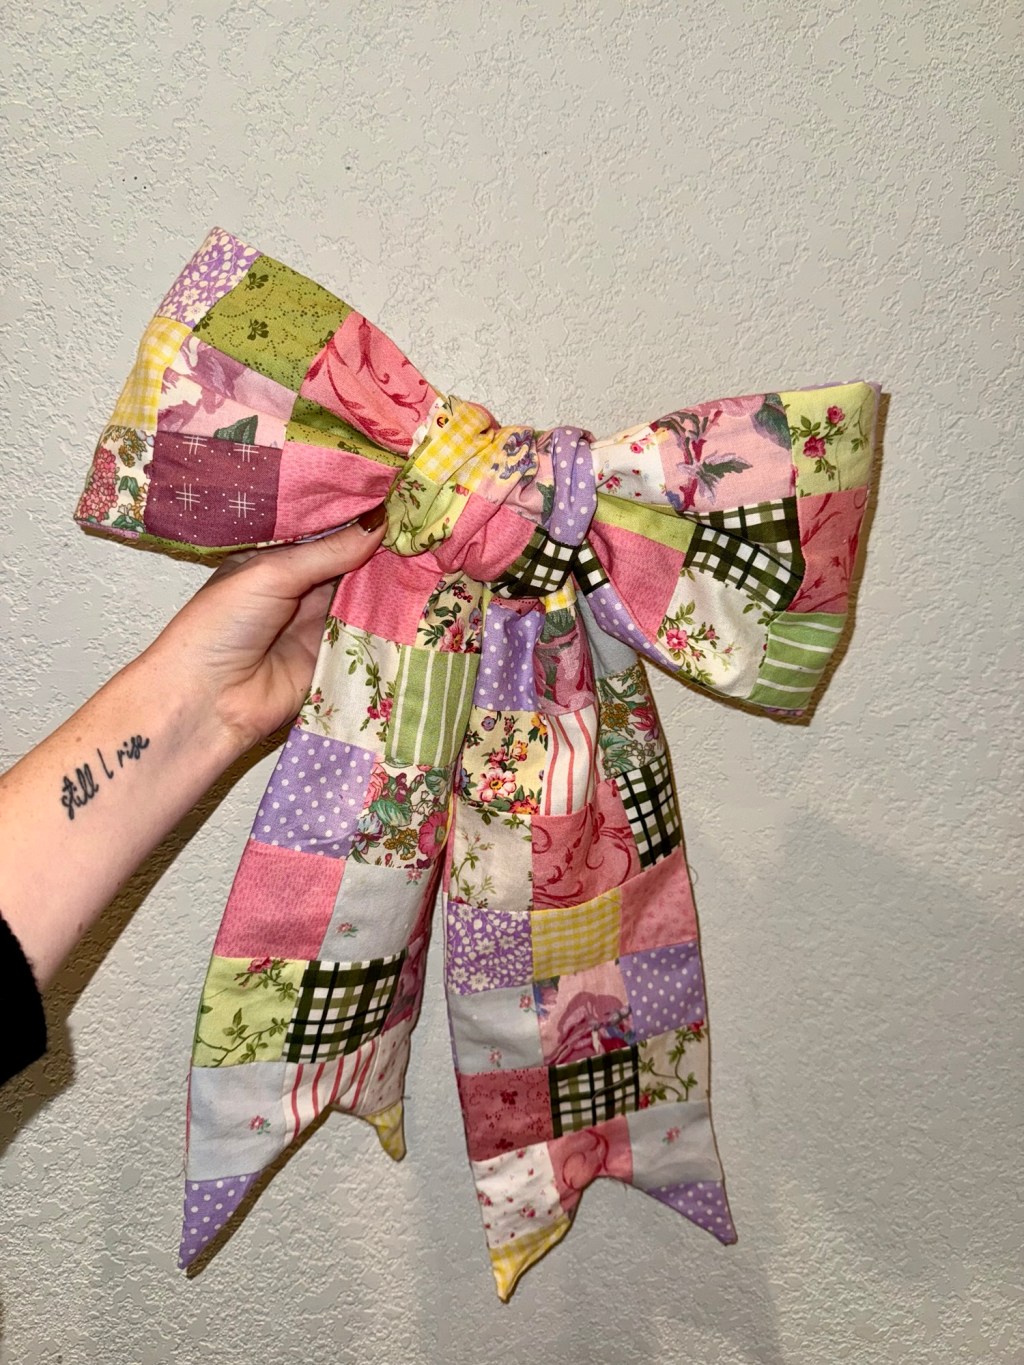
Patchwork bows are such a fun way to use up scraps, charm packs, or favorite prints—and the best part is that no two bows ever look the same. This tutorial walks you through how I made my patchwork bow using 2.5” squares, but feel free to adjust the size to fit your vision.
Materials Needed
- Sewing machine
- 2.5” fabric squares (charm packs work great!)
- Thread
- Pins
- Fabric scissors
- Iron
- Marking tool (pen or chalk)
Step 1: Prepare Your Squares
For this bow, we’ll be working with 2.5” squares sewn into rows of three.
I used 37 rows on each side, for a total of 74 rows and 222 squares. If you’re not using a charm pack, cut your fabric into 2.5” squares. Sew the squares right sides together (RST) in rows of three. Press the seams in one direction so they can be nested later.
I laid all of my rows out beforehand to make sure I loved the color combinations—but if you prefer a more scrappy, spontaneous look, feel free to sew them together randomly!

Step 2: Sew the Rows Together
Sew your rows together RST, nesting the seams as you go. Continue until you’ve reached your desired length. Remember: you’re making two long pieces, one for each side of the bow.
Once finished:
Press the seams of one piece to the right Press the seams of the other piece to the left This will help everything nest perfectly when the two sides are sewn together.

Step 3: Mark and Sew the Bow Shape
Pin the two long pieces RST, making sure all seams are nested. On both short ends, mark your desired “V” shape. Decide how deep or shallow you want the V. Mark the center point where you want the V to peak. Draw a line from the center point to each bottom corner. You will sew directly on this line.
Step 4: Sew Around the Perimeter
Starting on one long edge, sew around the entire piece using a ¼” seam allowance. Leave a 4” gap in the middle of one long side for turning. Backstitch at the beginning and end of the gap. When you reach the short edges, sew along the drawn V lines.
Once complete:
Trim ¼” away from the V seam Clip corners Make a small snip toward the center of the V (be careful not to cut your stitches!)
Step 5: Turn, Close, and Press
Turn the piece right side out through the gap. Use sharp scissors or a turning tool to gently push out the corners. Fold the edges of the gap inward by ¼” and topstitch to close.
Give the entire piece a really good press so it lays nice and flat.
If desired, you can also topstitch around the entire perimeter for a polished finish.
Step 6: Tie Your Bow
Now comes the fun part—tie it into a bow!
Use it however you like: décor, gift wrapping, hair accessories, or styling projects.
Have fun with it, make it your own, and enjoy the process 💫


Leave a comment